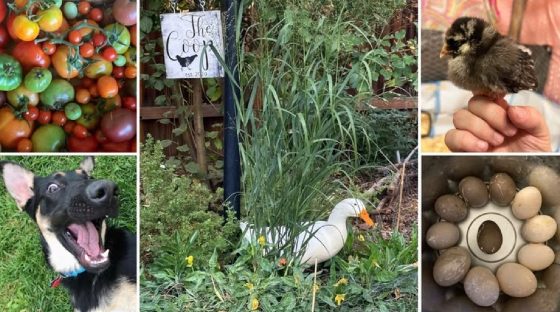
If you’re considering adding a feathered flock to your urban homestead, you’ll need to know the essentials of raising baby chicks before bringing those cute little peepers home. This comprehensive guide explains everything you’ll need to know before you get chicks, what you need to raise healthy, strong, and happy hens, to successfully moving them outdoors to their permanent coop.

Start with the Basics
Like all new parents, we want to give our babies the best we possibly can from the moment they enter our lives. Babies need a warm, safe place to sleep. Proper nutrition for their rapidly growing bodies. Their health and hygiene needs taken care of. When baby chicks come home it is not any different.
Preparing for your new baby chickens does not have to be overwhelming, and can be a very exciting time!
First and Foremost- Do Your Research
Before you get your hopes up, spend money building or buying a brooder, and bringing baby chicks home, make sure you can have them where you live. Every city is different. Where we live there is a strict no roosters/10 chickens maximum rule. And within my city even those rules vary. Most places also have codes about coop placement on your property and how big they need to be, how far away from your neighbors they need to be, and so forth… Some cities require permits with clear plans on waste disposal, safety, and may have larger square footage requirements.
Home Owners Associations are completely independent. If you have an HOA make sure to check before doing anything. Their rules and regulations supersede anything stipulated by your city codes. HOA’s can be much more restrictive. Just make sure to look into your city codes and HOA’s if you have one to make sure you don’t end up having to re-home your birds, or rebuilding your coop.
Where To Get baby Chickens
Spring is the most popular time to start buying baby chickens. If you have done your research and found that you are like a lot of other urban homesteaders, you probably cannot have roosters. How do you know if you’re getting a hen and not a rooster? Never fear, there is a solution.
Hatcheries
Your best bet for getting all hens for your flock is to order birds from a reputable hatchery, such as Cackle Hatchery and Meyer Hatchery. Metzer Farms is another excellent hatchery, mostly known for their ducklings, but offers a selection of chickens as well.
When you buy from a hatchery you can purchase ‘sexed‘ chicks which just means you can choose males or females, or a mix. Reputable hatcheries like the three I mentioned, offer 100% guarantees. So if you get a baby that ends up being a rooster, you can contact the hatchery and they will work with you on a refund or a replacement.
It is worth mentioning that when ordering directly from a hatchery there is typically a 3 chick minimum per order, so be sure to look for that. You don’t want just one bird anyway. I recommend, at the bare minimum, ordering 3. Birds are social creatures. If one dies, and you only have a flock of 2, you don’t want to scramble trying to find a new flock mate. Once you’ve determined which birds are right for you, and you’ve placed your order they’ll ship your new babies straight to your door!
Local Homesteading Shops
Check if your city has local homesteading or feed stores, they will often have chicks for sale in the spring that they get from reputable hatcheries, though most won’t have any guarantees on the chicks sex. We have a wonderful local store in my area that has online ordering starting in January. If you did not get an order in many local shops will sell unclaimed chicks together as a ‘straight run.’ Birds from a straight run are both roosters and hens, so it is possible that you can end up with all roosters.
Use Apps
Facebook, Craigslist, neighbors who raise birds, local farms, are also great places to look. Here you’d also run the risk of coming home with a rooster or two. If you go this route, ask beforehand if you can bring a rooster back and exchange him for a hen. Sometimes they’re more than happy to accommodate!
Supplies You’ll Need
There are some things you’ll want to have on hand before bringing your chicks home:
Brooder
First on the list is a safe shelter. Your baby chicks need a brooder. A brooder will be your new baby chicks first home! It is a secure place for them to explore, eat, sleep, and grow safely. Brooders do not have to be anything fancy, but they do need to keep those little ones free from harm. If you have cats, dogs, or small children in your home you’ll need to take extra precautions to ensure the chicks safety.

A brooder can be anything, as long as it’s sturdy and safe. Brooder walls should be a minimum of 2′ tall. I’d recommend taller if you have other pets or small children at home. I chose to build a brooder out of things I already had. I made mine large enough to accommodate the size the chickens will be when they’re ready to move out, rather than for how itty bitty they are when they first come home, and it also allowed me to comfortably clean their space.
Just to give you an idea, this is what I was able to create with leftover pickets, a roll of chickenwire fencing we had, and a spare tarp. It doesn’t have to be pretty, just sturdy and capable of keeping those baby chicks safe. We had ducklings at the same time so this brooder was built into two sections to accommodate both.


After I finished building the frame I attached the chicken wire fencing to the sides, and the top with an electric staple gun. I zip tied the tarp to the bottom. And to keep the prying eyes of the cats from terrorizing the babies, I used clothespins to attach towels to block their view.
When we first started out years ago we used we used giant plastic tubs which quickly turned into a a learning opportunity once the babies started to fly. We did not anticipate them learning as quickly as they did. We’ve also used a metal trough before using it as a planter. If you would prefer not to build anything, Amazon has a variety of brooder options available. Check your local feed and grain stores too. They usually have community boards for people searching for, or offering all sorts of things, including brooders!

Heat Source
Baby chicks can’t keep themselves warm until they’re about 6-8 weeks old so an outside heat source is crucial to their survival. I prefer to use a heat bulb. It more closely resembles the sun (meaning the heat comes from the sky) over a heat mat. With a lamp, I can raise and lower the fixture to adjust the temperature.
Watching your chicks is the best way to know if your chicks are too hot, or too cold. If they are spending all of their time on the perimeter of the brooder then they’re too hot. If they are all huddled under the heat light then they’re too cold.

You will want to use a red bulb. This helps to keep your chicks from pecking one another. They are little dinosaurs after all. The heat lamp needs to be left on 24/7. Place the lamp on one end of their brooder and not in the middle. This allows the chicks to have a warm and a cool side to hang out, depending on how warm or cool they are. Put their food and water on the end opposite the heat lamp so their water doesn’t get hot. They aren’t keen on hot water. If they won’t drink their water, they can get dehydrated and develop all sorts of problems, including death. So just keep it opposite the heat lamp. Easy enough.
Thermometer
Another must have in the brooder is a thermometer. It takes the guesswork out. Place it on the floor of the brooder, directly underneath the heat lamp so you can easily see exactly how hot or cold it is. Hanging the heat lamp from a rope allows you to easily raise or lower it depending on the brooder temperature.
Having a thermometer is also a great line of defense against a common occurrence in baby chicks known as pasty butt. Pasty butt occurs when a baby chicks poop sticks to the feathers around their vent, hardens, and seals the vent closed. This prevents them from being able to eliminate and can lead to death if not treated promptly. When a brooder gets too hot it can lead to dehydration in baby chicks. Dehydration is one of the most common causes of pasty butt. Stress is another common cause. For perspective- baby chicks get stressed from being shipped and likely get dehydrated on the journey without a water source.
The good news is, once treated, they rebound quickly and treatment is super easy! All it takes is warm water! Using either a wet, warm (not hot) washcloth, soak their buns until the poop starts to loosen, and comes off. Another option is holding your baby’s buns under warm running water, loosening the poo. Or, with constant supervision, you can give them a soak in a sink or the tub. No matter what you choose, don’t forget to wear gloves…

Bedding
Whether I’m raising baby chickens, or adding bedding to the coop outside, I use large flake pine shavings. These are large enough so the birds aren’t tempted to eat them, but small enough for them to want to scratch around in. There is not very much dust, but I would not say it is dust free. A nice thing about pine shavings is that it is absorbent and helps keep any smells down. I would strongly encourage you to clean their brooder out daily, and sometimes multiple times a day. This not only helps with odors, but helps maintain the overall health of the chicks. Bedding needs to be changed out completely every week or two, depending on how many baby chicks you have and how enthusiastic they are about pooping.
What To Feed Your Babies
There are two main options for chick food. There is medicated and non-medicated crumble. The medicated feed contains amprolium to prevent coccidiosis– an intestinal parasite that is harmful and can be fatal, to young chicks. The argument can be made that giving medicated feed protects young chicks from this parasite, while simultaneously preventing beneficial bacteria from growing. I’ve given both kinds to my feathered friends over the years. Maintaining a clean environment, a clean coop, fresh clean water, and mental stimulation also go a long in helping a chick grow up to be healthy and strong. But preventing things that are otherwise avoidable seems worth it to me.
To go along with the “keeping things clean” theme, I would recommend a trough feeder to begin with. Every single flock of chicks we’ve raised, without fail, feels that it is their life mission to climb, conquer, and claim their hard won king of the hill status by pooping on every single thing the ascend. Trough feeders are long and low, so if they climb on it and find they are in need of relief, they typically miss polluting the entire bowl of food.
Gravity feeders, on the other hand, are like a poop beacon. Once those babies learn to fly (which is faster than you think) they will perch and release, dropping bombs into their unsuspecting food below. After successfully defiling their food is when they decide they want to walk laps inside their feeder spreading poop, food, and mayhem along with it. Keep this in mind when choosing your feeder.
Grit and Treats
Handing out treats is my favorite part of the day. They excited little clucks. The chicken stampede. It is adorable. With babies, however, hold off on feeding them treats until they are at least 3 weeks old. Longer if you notice that they are not really eating their crumble feed. Just like you wouldn’t give a newborn baby a slice of cake, you should hold off on the good stuff with baby chicks until they are slightly more developed.
Grit is essential for chicks and chickens to digest their food. Local feed stores will carry grit, it’s available online, and it’s free if you get some dirt right out of your own backyard! Our preferred grit method is the backyard. This is great for 3 reasons- First, it’s free. Secondly, it exposes your baby chicks in a limited way to the microorganisms they’ll be living in and around. Last, it helps boost their immune systems. But do not make the mistake of introducing yard dirt too soon.
If you choose to go with unmedicated starter crumble do not expose your baby chicks to yard dirt before they are 2 weeks old. Dirt contains pathogens and parasites that the medicated crumble helps combat. At 1 to 2 weeks old a baby chick does not have an immune system, or digestive tract, strong enough to fight off anything that the soil might introduce. Sadly, we lost a baby chick from our first ever flock from this. So it can be, and often times is, fatal.
Mealworms are a fan favorite. Feed them sparingly though. They are very high in fat. It is cute when they come running when they hear the bag crinkling, but too many can cause issues. They can get indigestion, for one. Eating too many mealworms would be like eating an entire cake. Indigestion can easily lead to pasty butt. Less is more.
Rolled oats should be on the top of your list when choosing treats. They are full of minerals and essential vitamins to help them grow strong. Rolled oats can also help prevent pasty butt.
Fruits and Veggies are a great choice for birds of any age. They love cabbage, lettuce, collards, berries, you name it. I like giving ours frozen peas and frozen berries when the weather is hot as a nice treat. Fruits are harder to digest so wait until your chicks are at least 8 weeks old before introducing them to any fruit.
Treats to avoid– of course there are plenty of things baby chicks cannot eat that run the risk of causing serious harm, including death. This is by no means a complete list.
- Onion- destroys their red blood cells
- Avocado pits and skin (or any pits)- Pits contain persin which is toxic to chickens.
- Beans– dry or raw beans are fatal. If you choose to feed beans to your birds ensure they are properly soaked and cooked.
- Chocolate– Not sure why anyone would think to give a chicken chocolate, but don’t. It’s toxic and fatal to them.
- Leaves and stems from certain plants. Tomatoes are great, the leaves are not.
- Anything moldy– this has botulism and other toxins
- Potatoes and nightshade plants– These all contain solanine. Avoid potato peels, nightshade plants like leaves from eggplant and tomato plants, (tomatoes are fine.)
- Raw egg– Feeding raw egg can encourage egg eating behaviors in chickens.
- Scraps– If you would not eat it yourself, don’t feed it to your chickens.
- Anything fibrous– can cause crop impaction
- Processed foods– these sugary, nutritionally void foods can cause lots of digestive issues. No breads, no pasta. It’s just not good for them.
Any treat you give them they will smash on the ground like fuzzy little murderous tennis balls. They also chase each other around, regardless of how many available treats there are. So if you see them smashing mealworms, fruit, lettuce, or whatever you give them, it’s perfectly normal.
If you aren’t certain if something is ok, look it up. Better to be safe than sorry.
Handling
Whenever you handle your chicks you should ply them with treats. In moderation of course. Yes, the more babies are handled, the more accustomed to it they’ll get. But you should always have treats when handling them when they are little. They learn to associate being held, or you, with treats. In other words, it’s how you get them to like you. It also allows you to catch them more easily if the need should arise. Like checking for pasty butt, or any other ailments/ injuries. Or, in our case, needing to pull them off the top of the chicken coop roof to place them inside of their coop every. single. night.
Waterer
Gravity waterers are my choice for a brooder. They are easy to clean and aren’t so deep that chicks can accidentally drown. Quick tip- Baby chicks LOVE to scratch around. They will constantly be rearranging their pine shavings right into their water if the water is not elevated. I quickly learned to put the waterer on short 2×4’s to help keep it from getting bogged down with pine shavings. I add more 2×4’s to lift it higher as needed. Or a cinderblock if they are exceptionally skilled and launching pine shavings.
Training Pee Pads
These are optional, but I personally would not have a brooder without them. I’m not sure how these little velociraptor wannabe’s do it, but they manage to launch their leavings into unexpected places. Pee pads have saved my sanity, and my walls. And, by lining the bottom of the brooder before putting the pine shavings down makes clean up easier. Just roll up the pads, shavings and all!
Small Mirror
Along with my little chicks, my hens also have mirrors in their enclosure. There have been numerous studies on the use of mirrors and the impact they have on behaviors. Chickens, along with other types of birds, are shown to have reduced stress levels, are calmer, quieter, and eat better. It could be for a number of reasons- they might feel like they have a flock mate, they are more mentally stimulated, their curiosity is piqued, bottom line- they love it. So I always include mirrors in the brooder set up and always have mirrors in their digs outside.

Perch
Baby chicks already have natural perching instincts. Around week 3 they will start micro-flying. Next thing you know they’ll be flying up and landing on to top of the waterer, the mirror, or anything else that in the brooder. By having a small perch your baby chicks will be able to develop their muscles and balance, and deepen those natural instincts to perch. It is also good practice for when they move into their permanent home and sleep inside a coop on a perch. Being elevated off their soiled shavings is better for their health as well. When chicks are one week old, place a sturdy branch or stick in the brooder for them to explore. Like mirrors, perches serve as something fun to do which helps reduce boredom and stress.
Baby chicks are still small enough to use sticks, branches, and other round things to perch on. However, between 4-6 weeks switch their perch to a 2×4. Round perches are bad for pullets and adult chickens. This forces them to constantly grip the round perches which makes for poor sleep, strains their muscles, and leaves their feet exposed during cold weather making frostbite more likely to occur. Chickens prefer flat surfaces so they can cover their feet with their feathers to help keep their feet warm.
Pullets are hens under the age of 1 that have not started laying eggs yet. Aka a teenager. A cockeral is a male chicken under the age of 1.

Gloves
Unless you want to touch chicken turds with your bare hands, you’ll want some gloves. Latex, bamboo, construction, whatever works. I’d recommend something that isn’t cloth. Those will soak up any moisture in their leavings, and… well… you would be better off avoiding that. Chicken droppings can contain E. coli, Salmonella, and Campylobacter, severe diarrhea, vomiting, fever, and abdominal cramps. Make sure to wash your hands after cleaning. even if you’ve worn gloves. It’s good to get into the practice of washing your hands after handling them as well.
What to Expect Your First Moments Home
Baby chicks first day home will be overwhelming for them. They will likely be dehydrated and cold from being shipped, and then flash banged from the light of the heat lamp after emerging from a dark box. Add some Rooster Booster to their water to give them a vitamin and nutrient boost. Do your best to have their brooder completely set up before they come home so you can limit additional stress. Refrain from handling them for the first 24-48 hours to allow them to acclimate to their new home. You can sit next to the brooder and talk to them, though, so that they get used to being around you.
Week by Week

Weeks One thru Six- The Chick Stage:
If you are raising baby chicks in a brooder they are completely dependent on you for food, water, and warmth. Their rate of growth is incredibly fast. To ensure they grow healthy, happy, and strong it is essential that they are receiving the essential nutrition and care they need in this early stage.
To get chicks accustomed to being handled it is important that you start early. Spend time with them multiple times a day. I also sit on the floor when picking them up. They tend to be quick and can leap from your hands. If that should happen, better to be closer to the ground.
Week One
Baby chicks will increase in size by 50%! This week their wing feathers start emerge, they start pecking, and become more active. Make sure to keep an eye out for pasty butt! They should be eating chick starter crumble, either medicated or not.
Week Two – Three
Baby chicks start becoming more social around this time and begin to establish a pecking order. Just remember, it’s all fun and games until someone gets hurt. Just keep an eye on them in case anyone gets a bit overzealous.
You can also start taking your babies outside on field trips! Since they are still not fully feathered they cannot regulate their body temperature. Make sure any field trips happen on warm, wind free days. Ideally 70°, but 55°- 65° will be ok. Their first field trips should be limited to 15 minutes. Slowly increase the amount of time they spend outdoors as they get older.
Make sure they have a safe place to stay, like an old dog crate, or some other completely contained enclosure. They need a safe place to protect them from overhead predators like hawk which are common in my area. They will also need a sunny side, and a shaded side of their outdoor playpen. Provide food and water for them, and never leave them unsupervised.
Weeks Four – Six
We are entering the awkward teenage stage. All of their fluffy down feathers will be replaced with contour feathers or juvenile plumage. Their adult colors and patterns also become visible. With the growth of these adult feathers baby chicks are able to regulate their body temperature now and won’t require a heat lamp at the end of week six.
Most chickens are fully feathered by week six, but there are some breeds that take 8-10 weeks for all of their plumage to emerge. To determine if your baby chicks are fully feathered you can do a wing check. Carefully lift a wing, and if the underside is fully feathered, they are ready to move outdoors!
Wattles and combs also begin to grow larger and brighter red. Differences between roosters and hens start becoming visible now too. Roosters comes grow larger and faster than their hen counterparts. Rooster feathers are also pointier and their tail feathers are longer. While most roosters won’t start crowing until they’re 5-6 months old, it’s not unheard of for some to start early. Our most recent roo- Jeff Pecker, was an early crower.
The Peter Brady moments provided us with unending entertainment. Jeff would crow, the cats would jump, it was awesome. Sadly, we cannot keep roosters in the city where I live, but we already had a game plan in case any of our babies were boys. I’d recommend having a gameplay BEFORE getting chickens so you are not left scrambling at the midnight hour.
By now they should also be enjoying a good deal of outdoor play time, weather permitting. You can start ‘introducing’ them to any other chickens you have by placing their outdoor play space next to your other chickens.

Weeks 6-8
By now your chicks have all of their feathers and are no longer needing a heat lamp for warmth. They will continue growing rapidly, and now require twice as much space than they did as baby chicks. Pecking orders are also becoming more defined. Now is the time to start preparing them for their move outside.
Preparing to Move Out
Depending on the weather where you are, hopefully you have been able to take your babies outside for supervised field trips which gives them a head start towards moving out. When the nighttime temps are consistently 50° and above, and they are fully feathered, it is safe to stay permanently outdoors. If you have other chickens you will need to introduce them to one another similarly to how you’d introduce cats. How they have managed to evolve is beyond me.
A few tips on integrating a flock:
- Baby chicks should not be mixed in with adult chickens until they are the same size and able to defend themselves.
- Separate the existing flock from the newbs with cardboard, chicken wire, whatever you have so they can only interact in extremely limited ways. Remember, they will fly on top of things and will sneak into each other areas and rumble if given the opportunity.
- There is safety in numbers. Introduce adult hens to the babies one at a time. Stay in the enclosure with them. You never know how this will go.
- Swap spaces- put the hens in the chick area and vice versa. This helps eliminate turf wars.
- Use toys as a distraction- hand a cabbage from a rope for them to peck, or place pesticide free grass clippings or straw for them to annihilate.
- Put a crate inside the enclosure with the big hens and close the babies inside. Sprinkle a fan favorite treat, like mealworms for everyone to enjoy. This lets everyone see and hear each other safely.
- Make hiding places for the babies from cardboard boxes with openings the bigger hens can’t fit thru.
- Use your judgment. If you think they are ready to interact, give it a shot. If it turns into a chicken sized war, split them back up and try again on a different day. They’ll get there.

Hopefully you will find the experience of raising chickens as entertaining and rewarding as we have. If you are not sure where to start, not sure what you’ll need, or need tips on how to combine young and older hens, save this guide or share it with someone starting their own backyard flock!
We would love to hear about your experiences raising chickens and welcome any questions you might have in the comments section!
Grow where you live. Build what you need. Learn as you go.

Meet the Splinters and Sprouts Bawking Brigade here!